 Mental Ray for Maya offers all the features traditionally expected of photorealistic rendering. Mental Ray is also the industry-standard 3D rendering software, used by film, broadcast, & digital publishing.
a. Load Mental Ray in Maya 3D 2012
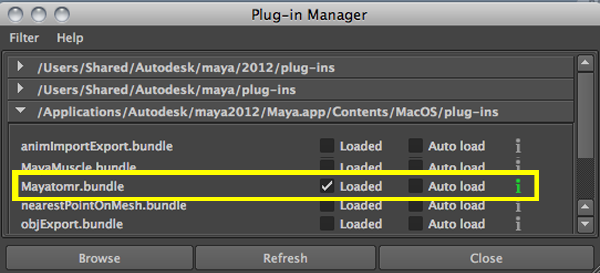
Before start working with Mental Ray the plug in must be loaded. To load mental Ray go to Window > Settings/Preferences > Plug-in Manager

When the Plug-in manager window opens, check the box Mayatomr.bundle.
Open the render settings window and and select Mental Ray as the renderer.

b. Mental Ray Quality
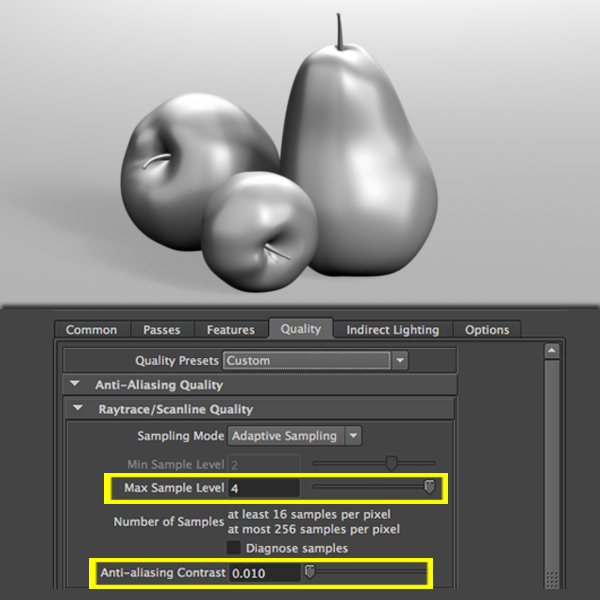
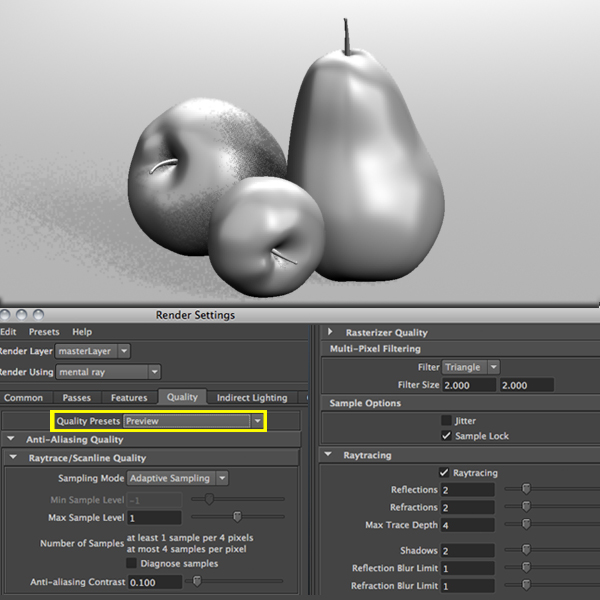
The quality of the final image depends on the Mental Ray settings, click on the Quality tab on the render settings window.
There are 2 important settings that will determine your images quality, Raytrace/Scanline Quality & Raytracing.
Raytrace/Scanline Quality:
1. Sampling Mode: Sampling is the number of times Mental Ray reads and compares the color values of adjavcent pixels in order to avoid jagged lines and display a smooth image. You can select Fixed Sampling, Adaptive Smapling Default), and Custom Sampling. Custom sampling is usually the best choice becuse the number will automatically adjust to the number of samples used per pixel depending on the contrast of your scene.
2. Max Sample Level: This is the absolute maximum number of samples per pixel used when processing an image. A higher the number results in a very high quality smooth image. Most images render well with a Max Sample Level of 2.
3. Anti-aliasing Contrast: This slider controls the contrast threshold. Lowering this value increases sampling which results in higher quality but longer processing time.
Raytracing
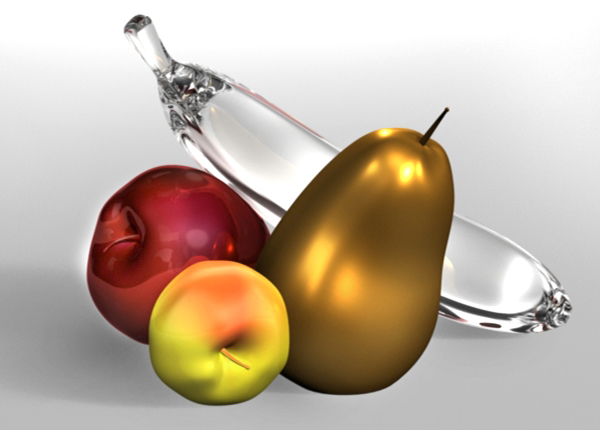
Raytracing can produce the most physically accurate reflections, refractions, shadows, global illumination, caustics and final gather.
1. Reflections: The maximum number of times a ray can be reflected off reflective surfaces.
2. Refractions: The maximum number of times a ray can be refracted through non-opaque surfaces.
c. Quality Presets
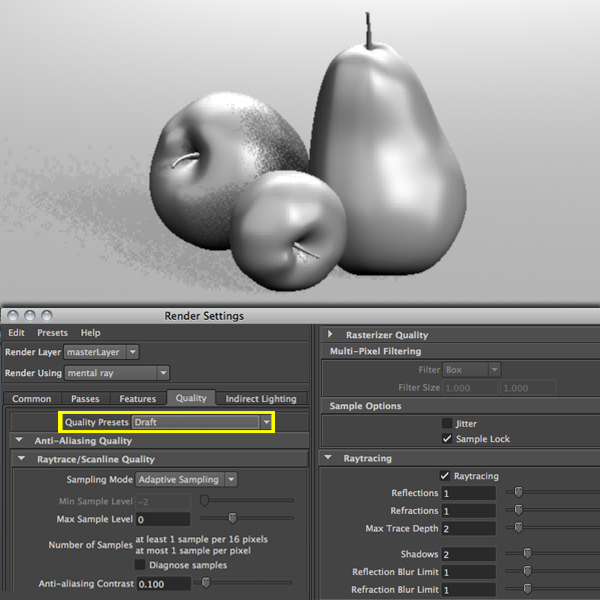
When you select a Preset Maya automatically set the values for the rendering. Below you can find some preset examples:
1. Draft: Gives you a relatively good indication as to what scene will look like while taking the least amount of processing time.
2. Preview: Slightly better than Draft, takes a little more processing time, but achieves a good balance between quality and time
3. Production: Use this when testing the final rendering or rendering the final image(s) that do not contain motion blur.

4. Custom: Lets you specify the mental ray for Maya quality settings independently. If on the production preset your image has pixelated sections, you can reduce the Anti-Aliasing Quality to smooth out edges.
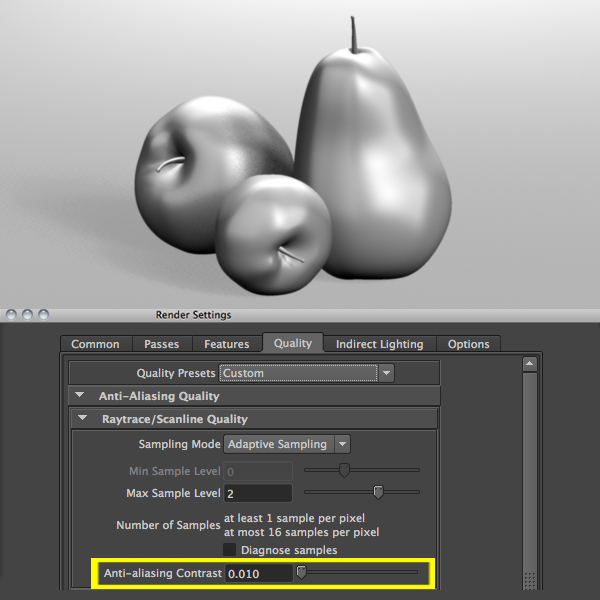 If reducing the Anti-Aliasing Quality is not enough, you can increase the Max Sample level. However a number will take longer to render.