1. Maya 2012 Projects
Before you start to working in Maya 2012, you need to set a project.
A project stores all the files related to a particular scene like scenes, images, materials, & textures.
A project consist of the following:
1. Project root directory: This is the top level directory associated with a Maya project.
2. Project definition file: A Maya project definition file is named workspace.mel and is stored in the project’s root directory. This file contains a set of commands that define where various types of files are located.
3. Project sub-directories: Scenes, templates, images, source images, etc.
I. Creating A New Project
You can specify the location of the project root folder in the Project Window.
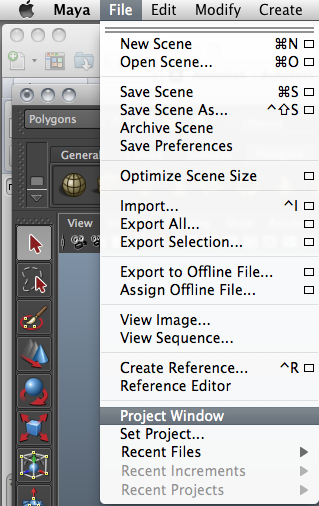
 a) Select File > Project Window
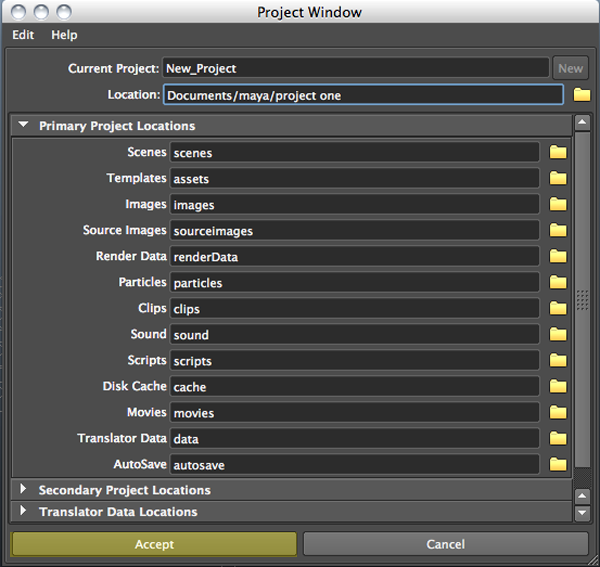
The Project Window appears
b) Click New.
When creating a new project, you can use the default locations and names that Maya generates by default, or you can specify custom ones.
In the Project Window you can also:
You can clear all the locations by selecting:
Edit > Clear Settings
You can restore the default project locations, select:
Edit > Reset Settings.
 c) Click the browse icon to the right of location, and then specify a location for your project directory.
d) Type the name of your new project in the Current Project text box.
e) Click Accept to save your changes and close the Project Window.
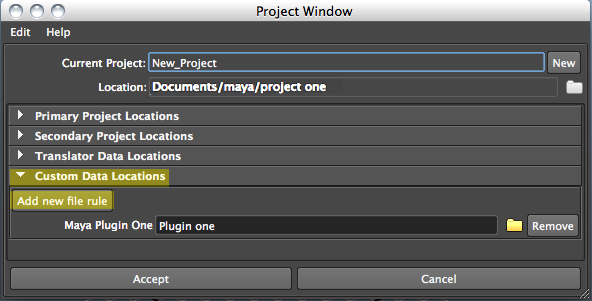
Custom data locations:
You can create locations for your project by adding a new file rule. You can use custom locations to store data, such as data generated from third-party plug-ins you are using with Maya.
II. Files/Projects Preferences:
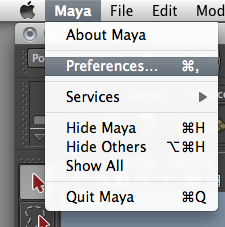
You can set the following preferences in the Files/Projects category of the Preferences window.
 Projects Settings: Default projects directory, Always start in this project
Use these settings to set up a default projects directory when you create new projects and on startup.
Recent History Size: Files, Increments, Projects. Specify how many files, increments, and projects you want to have listed in each of the File > Recent submenus.
Autosave: When turned on, Autosave automatically saves your scene at timed intervals. The files are saved according to the Autosave options with the name AUTO-SAVE followed by an incrementing numerals.
To turn on Autosave: Check “Autosave” to Enable
Prompt before save: Prompts the user with a dialog box before autosaving.
Autosave destination: Determines where the autosave file is stored.

2. Create/Save New Scene
Maya refers to everything you’ve created in your workspace (objects, lights, cameras, materials, source images, etc.) as the scene.
To save your Maya scene: Select File > Save Scene.
To create a new scene: Select File > New Scene.
3. Set a Project
Every time you work in Maya you have to make sure that the correct project is set up. Maya does not embed all the files associated with your project in your scene instead, the files are linked to it so if you forget to set up the project, the paths associated with the files you need may not work and you might save files in the wrong location.
IMPORTANT: Opening a scene does not automatically set a project; you must set it up manually.
To set a project or change the current project you are working on:
a) Select File > Set Project
b) In the Set project window, browse to the location of the project you want to open.
c) Click Set.
 When you change projects, Maya will start saving your project data to the newly set project locations.


