Moving from 2D to 3D design can be challenging since most of us design using only two dimensions. However, you’ve done this before but you just don’t remember! Maybe you haven’t realized that building objects in Maya 3D is somehow similar to building objects using Legos. The key to design in Maya 3D is to think spatially. In Maya, we design not only acknowledging width and height we also incorporate depth!
It takes some practice and lots of patience to develop 3D spatial ability, so below you’ll find some basic Maya 101 concepts that will help you better understand the 3D environment.
1. X,Y and Z
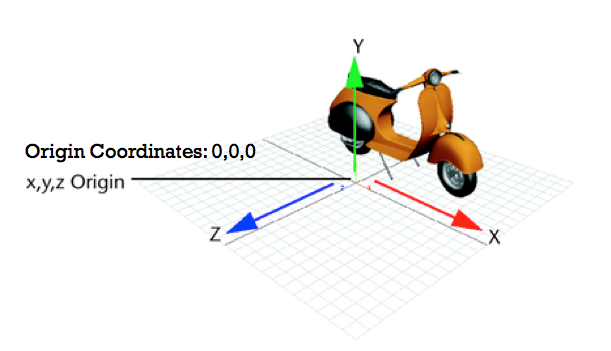
In Maya the X axis is the width (red), the y axis is the height (green) and the Z axis is the depth (blue). The y-axis is also referred to as Y-up. The center of the coordinate system is called the origin and the coordinates are 0,0,0 for x, y, z.
If you want to manipulate an object in Maya you can:
a) Enter x, y and z values for translate, rotate and scale in “Channel Box”

Translate: Value “0” in x, y and z, position the object on the center or “origin” of the workspace.
Rotate: If you by mistake rotate an object, set all the values to “0”. This will take the object back to its default position.
Scale: “1” is the default value and it means the object’s size is 100%. If you want to make the object twice its size enter 2 in all the scale values.
If you want to make an object half its size enter 0.5 in all the scale values
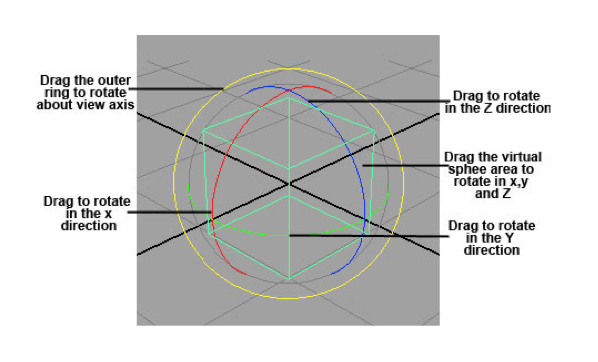
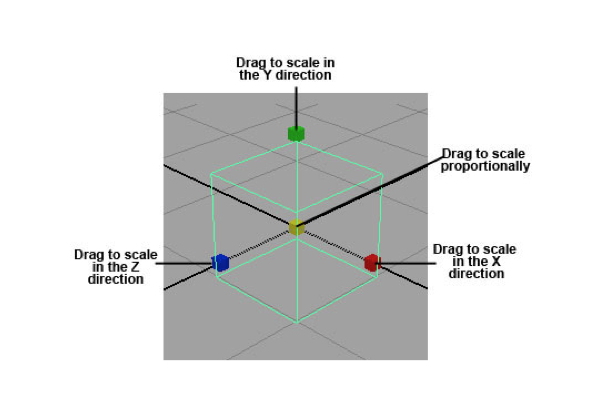
b) Use the manipulators handles of the move tool, scale tool and rotate tool.

 When moving & rotating objects in Maya, it’s recommended that you move or rotate the object only along one axis, this can help you maintain your objects aligned.
You can do this by pulling the arrows of the move tool or by dragging the rings of the rotate tool. Moving the objects from the center handle will allow you to move the object freely across the view plane and it can be hard to control its translation and rotation.
When scaling object is Maya, if you want to maintain the object’s proportions drag the center box to scale uniformly in all directions.
2. Views
When working in a 3D environment is very important to check that the object you are building looks good in all the views. Looking to just one view can be deceiving and you object might not be positioned correctly.
In order to ease the design process Maya provides up to 4 views, one perspective view and three orthographic views.
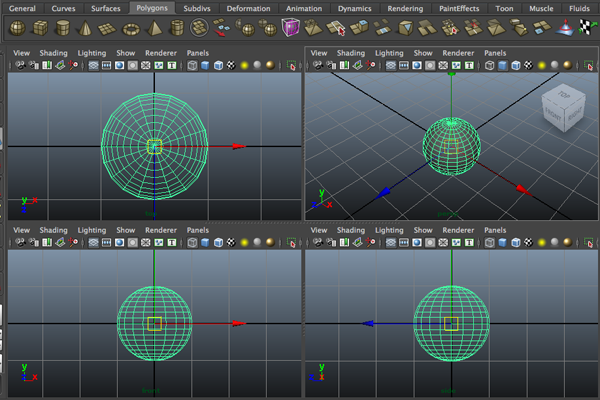 When you look at the object from the perspective view you can revolve the camera to freely tumble around the object. However, when you use orthographic views (top, side & front) they only focus in 2 axes at the time, so you can’t tumble around (unless you use the tumble tool).
3. Polygonal Modeling vs NURBS Modeling
Polygons:
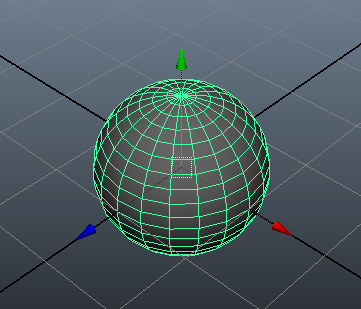
Polygons are the most basic geometry in Maya they are straight-sided shapes of 3 sides or more. Polygons have faces, edges & vertices, some examples of polygons or primitive shapes are spheres, cubes, cylinders, cones, and planes.
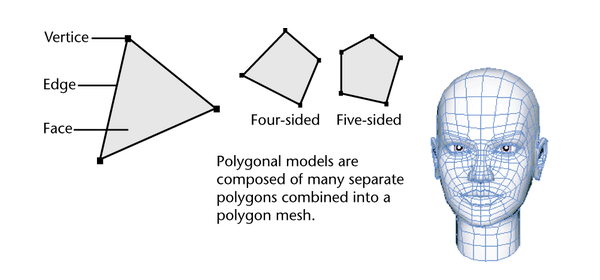
Because polygon’s surfaces can be directly extruded, scaled and positioned designers prefer them to create characters in Maya.
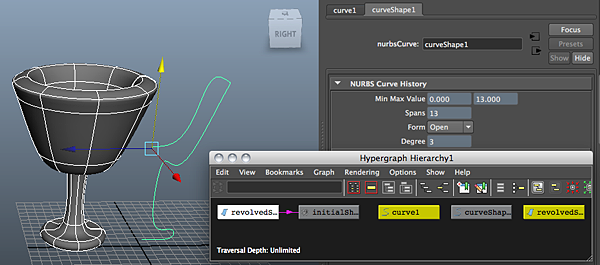
NURBS Curves and NURBS Surfaces:
NURBS curves stand for Non-Uniform Rational B-Splines. NURBS curves are very handy since you can draw them in Maya or import them from a vector program like Adobe Illustrator.
NURBS primitives or surfaces, use UV coordinate space and you can modify them by trimming away portions of their forms, beveling their edges, or by sculpting them into different shapes using the Maya Artisan sculpting tools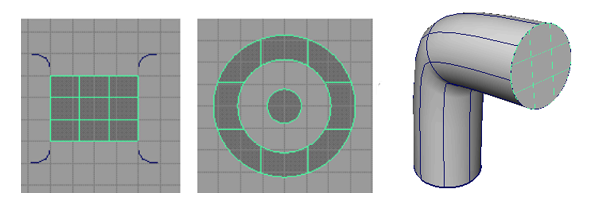
NURBS are preferred for constructing organic 3D forms because of their smooth & natural characteristics.
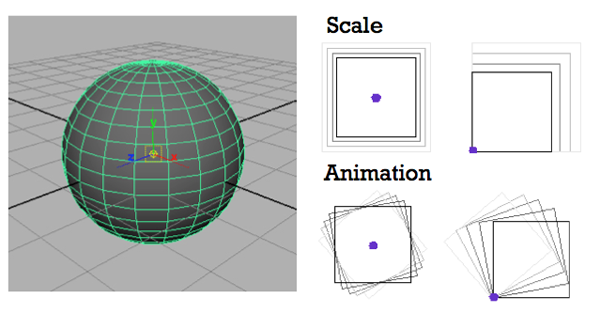
4. Pivot
All transformations to an object are relative to the pivot point. The object’s pivot affects scale since the object will scale out from or in toward the pivot point. The pivot also affects the object’s rotation/animation because an object rotates around the pivot point.
5. Subdivisions
Polygon Subdivisions:
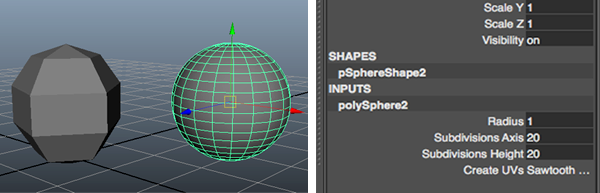
- If a polygon has less subdivisions, for example an value of “5”, it will have less detail and a rougher surface
- If a polygon has more subdivisions, for example an value of “20”, it will have more detail & a smoother surface
NURBS Subdivisions
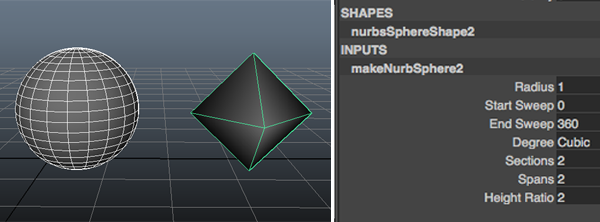
- If a NURB has less sections & spans, for example an value of “2”, it will have less detail and a rougher surface
- If a NURB has more sections & spans, for example an value of “20”, it will have more detail & a smoother surface
6. UV Coordinate Space:
Surfaces in Maya have their own coordinate space. UV Coordinate Space is useful when working with curve-on-surfaces and positioning textures.

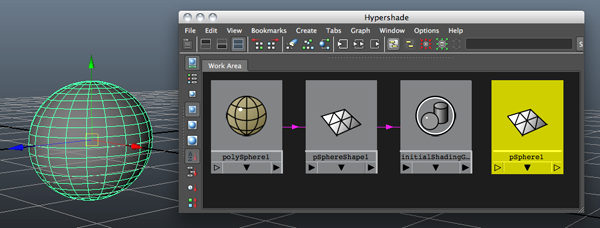
7. Nodes
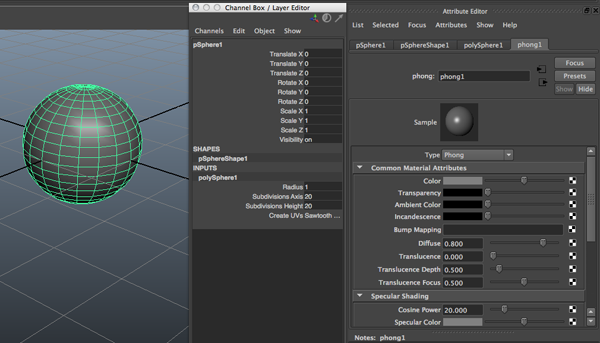
Every element in Maya is built with a single or a series of nodes. Nodes define all attributes like lighting, shading and geometry.
For example a primitive polygon, such as a sphere, is built from several nodes: a creation node that records the options that created the sphere, a transform node that records how the object is moved, rotated, and scaled, and a shape node that stores the positions of the spheres control points.
Shape nodes:
Holds an object’s geometry attributes or attributes other than the object’s transform node attributes.
Rendering nodes:
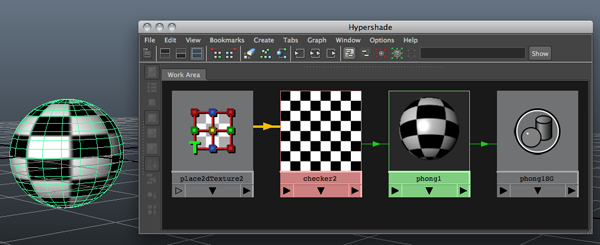 Materials and textures each have nodes containing attributes that control their look. Texture placement nodes have attributes that control how a texture is fitted onto a surface.
8. Attributes:
An attribute is a position associated with a node that can hold a value or a connection to another node. Attributes control how a node works.
To change an object’s attributes you can use the Attribute Editor & the Channel Box.
9. Construction History:
When you work in Maya, all the actions you make create nodes in the construction history of the objects you are working on. Construction history is very important because it allows you to change an object.
If you are only modeling it’s recommended that you delete construction history once you are 100% sure you have the object you need. This prevents accidental changes and speeds up the shading & rendering process. However, if you are going to animate is not recommended that you don’t delete construction history since some dependency nodes have attributes that can be animated.
10. Hierarchy
Grouping
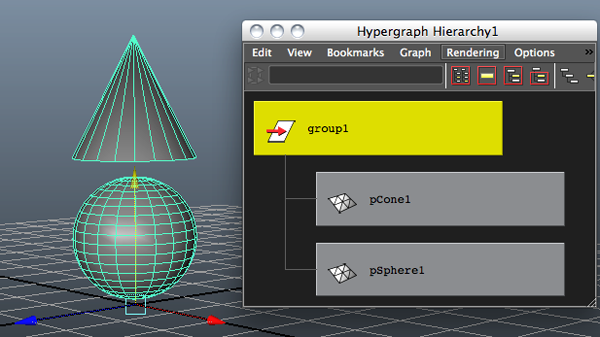 To control multiple objects with one node, you can group objects together under a new transform node. By grouping objects, you can move, shade, texture, and do many other actions to all the objects at the same time.
Parenting
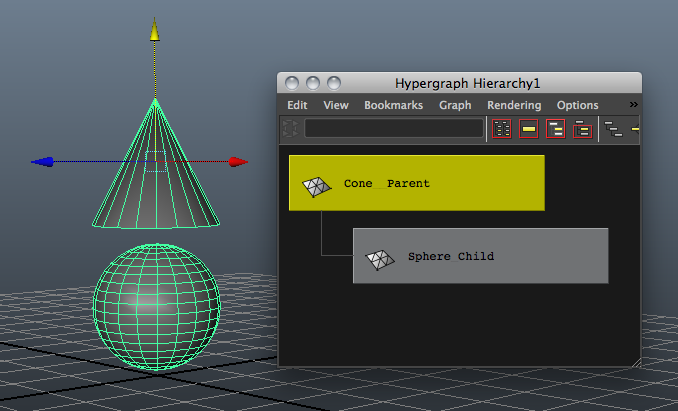 The child objects have independent nodes, for example a child can rotate by itself without rotating the parent. However, if the parent is rotated or moved the child follows.


Great, that’s really helpful! the cheat sheets too. you’ve been RSSed! :-)
Thanks Tim! I’m glad you can use them :)